iPhone 5S Battery Connector Replacement

Send this link via e-mail
|
Tweet |
|
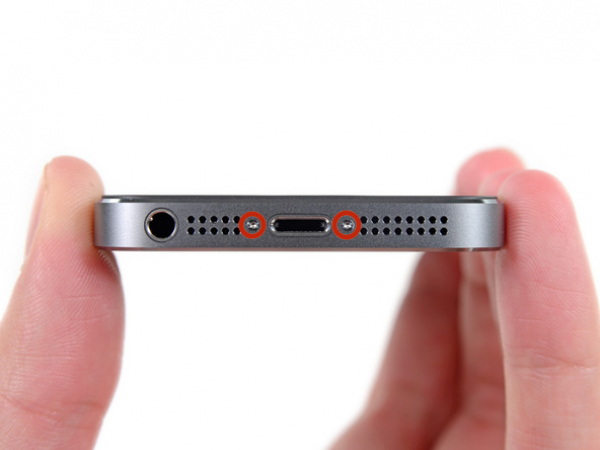
Step 1 - Front Panel Assembly
Turn off your iPhone before starting the disassembling process.
There are two 2 mm Pentalobe screws next to the Lightning connector. You need to remove them.
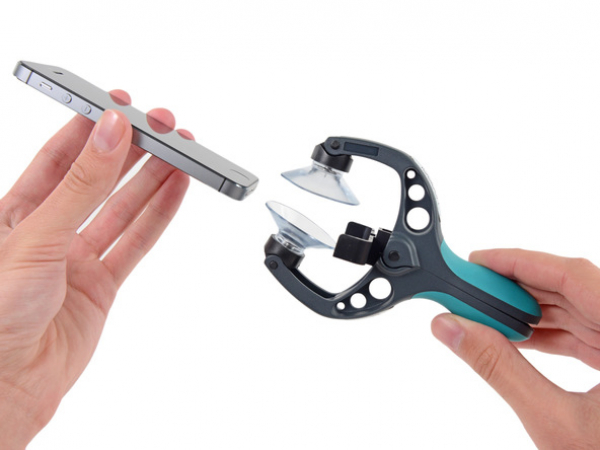


Step 2 - ISclack Opening Procedure
Back to top
In the next two steps you'll learn how to use the iSclack - a tool for safely opening the iPhone 5s. Using this tool is recommended for anyone who plans on repairing their device more than once. If you're not planning on using the iSclack, proceed to step 4.
Open the suction cups by closing the handle on the iSclack.
Put the bottom of your iPhone between the suction cups. It needs to be pressed against the plastic depth gauge.
Put the bottom of your iPhone between the suction cups. It needs to be pressed against the plastic depth gauge.
Open the handles in order to close the iSclack. Position the cups so that they are pressing the top and bottom of your iPhone in the center.
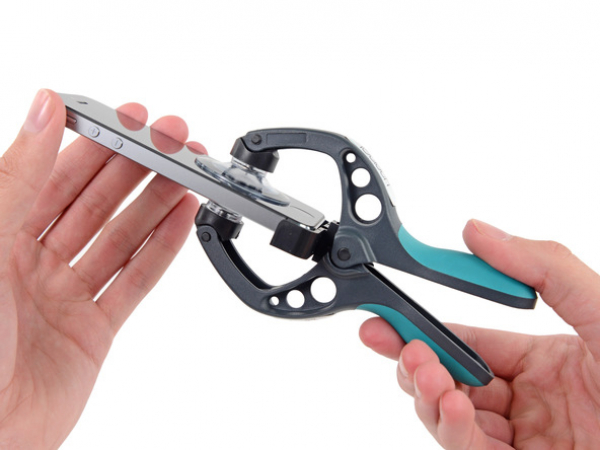


Step 3
Hold your iPhone securely and separate the suction cups once again (by closing the handle). Pull the front panel away from the rear case.
The iSclack is designed in a way that will open your iPhone safely and enough to separate the pieces. It won't damage the home button cable.
Remove the suction cups from your iPhone.
Skip the next three steps and proceed with step 7.
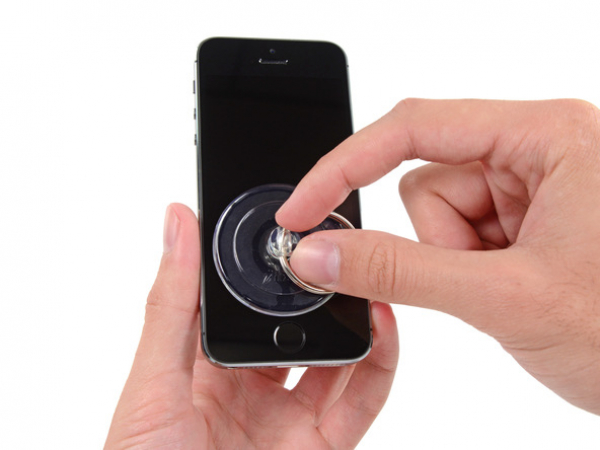
Step 4 - Manual Opening
Back to top
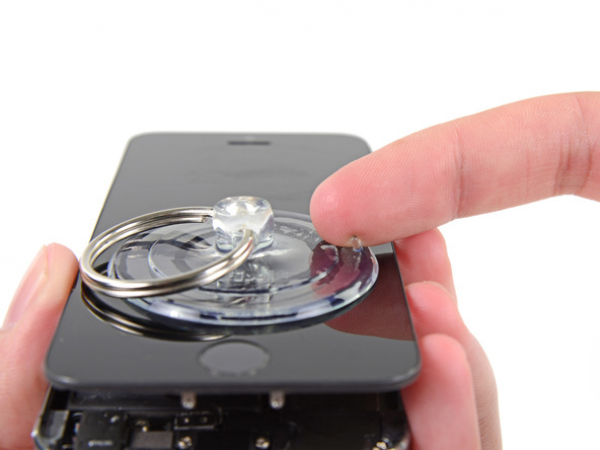
In case you don't have an iSclack, you can use a single suction cup in order to lift the front panel.
Press the cup onto the screen, above the home button.
Make sure the cup is pressed completely against the screen. This will get you a tight seal.

Step 5
There are several ribbon cables connecting the front panel to the rest of the phone and it is also attached with clips. You need to loosen the clips just enough to disconnect the cables. Do this slowly and carefully to avoid any damage.
The cup should be firmly pressed to the front panel assembly (near the home button).
Hold the iPhone down with one hand and pull up on the suction cup. Separate the front panel (the home button end) only a little from the rear case.
Pry the edges of the rear case down and away from the front panel assembly using a plastic opening tool. Do this while pulling up with the suction cup.
You may need to apply some force in order to do this. Don't rush it and be careful, because the 5s front panel assembly is harder to remove than on other devices.


Step 6
There are still some ribbon cables securing the front panel assembly at the top of the iPhone, so don't remove the assembly completely immediately.
Pull up the ring on the suction cup to separate it from the iPhone.
Take the suction cup off the display assembly.


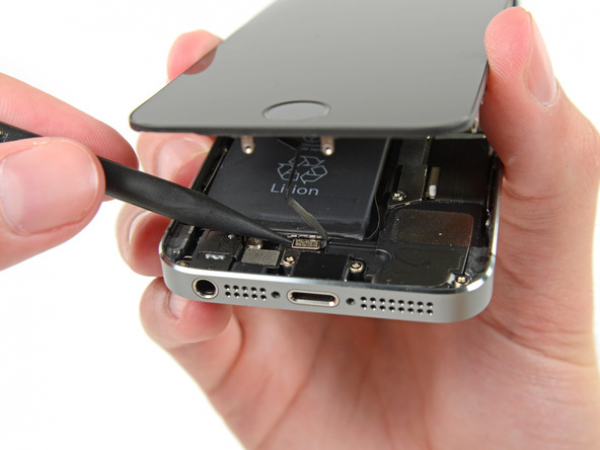
Step 7
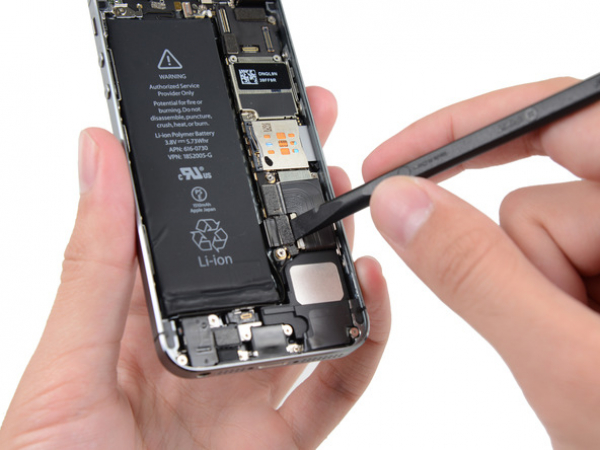
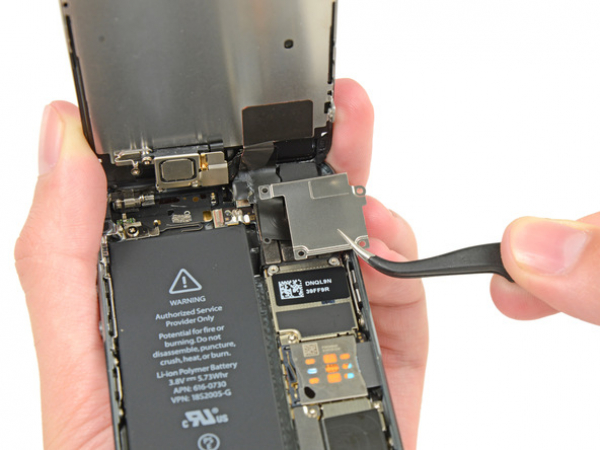
Pry open the iPhone enough to reveal the metal bracket that is covering the home button cable.
If you open the iPhone too much, you can damage the home button cable or the socket it plugs into. The cable should be loose. In case it's stretched taut, that means that you've opened the iPhone too much.
Bear in mind that the Touch ID function will work only with the phone's original home button assembly. If you rip the cable, you'll have to install a new home button which won't come with the Touch ID features.
Push the bracket with the tip of a spudger and take it off with a pair of tweezers.
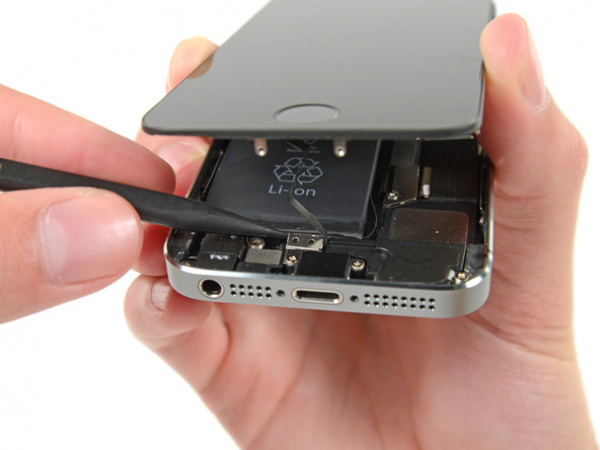
Step 8
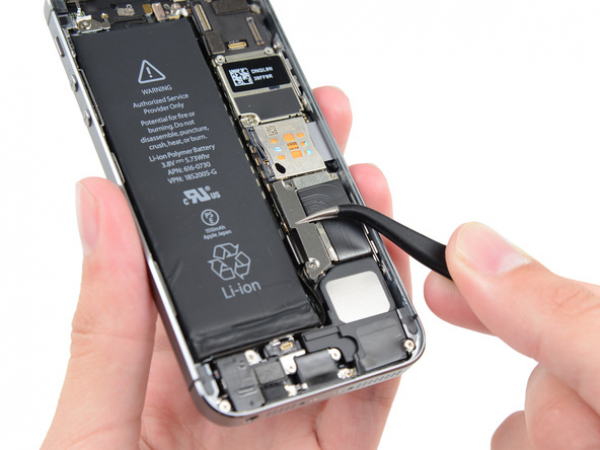
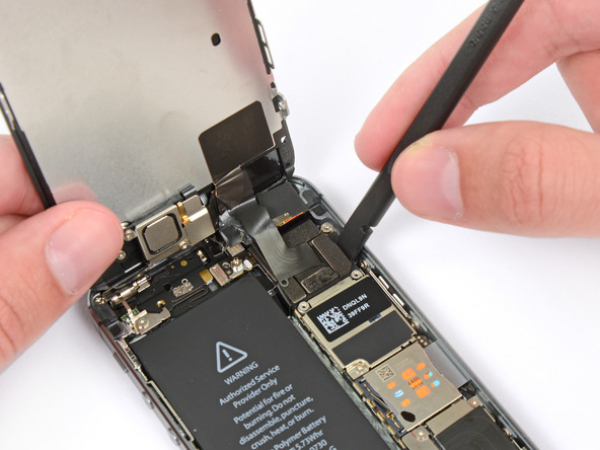
Take out the home button cable connector out of its socket with the tip of a spudger.
Be careful not to lift out the entire socket. You only need to separate the cable connector from its socket. The socket itself is located on its own glued-down cable that can also be pried up if you're not careful.
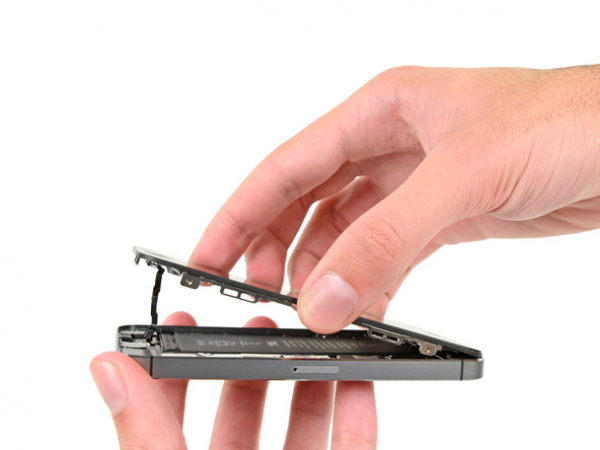


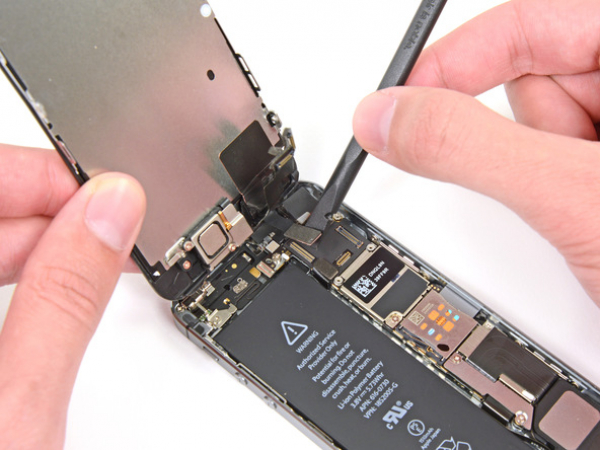
Step 9
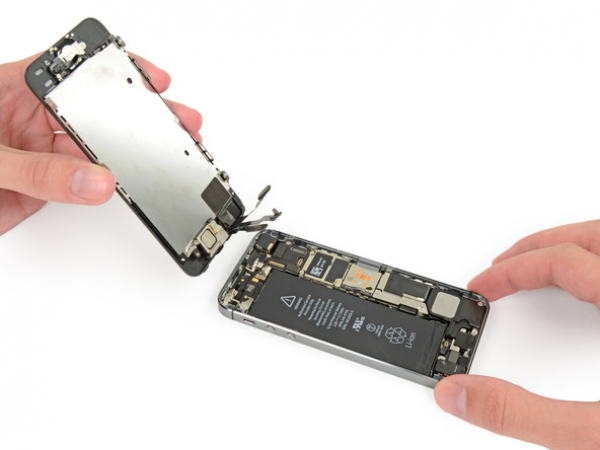
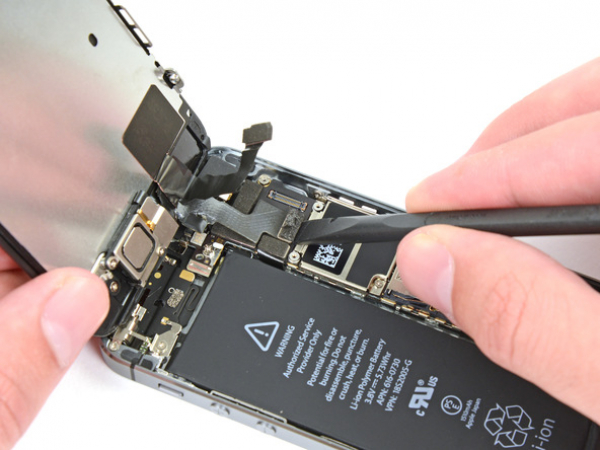
After releasing the connector, pull the assembly away from the rear case (by the home button end). Use the top of the phone as a hinge of sorts.
In the next few steps, keep the front panel assembly at a 90º angle (in relation to the rear case) until you have removed it.
Step 10
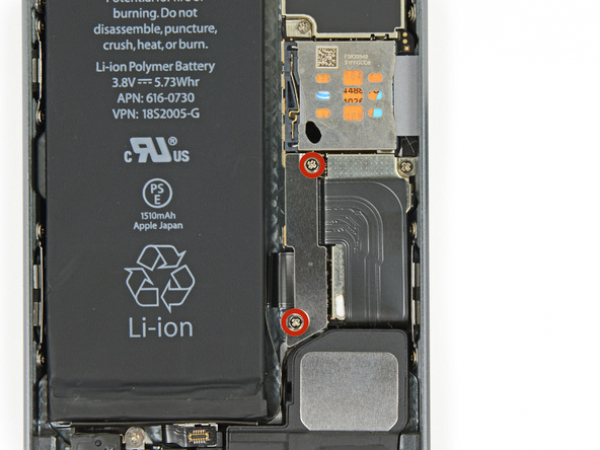
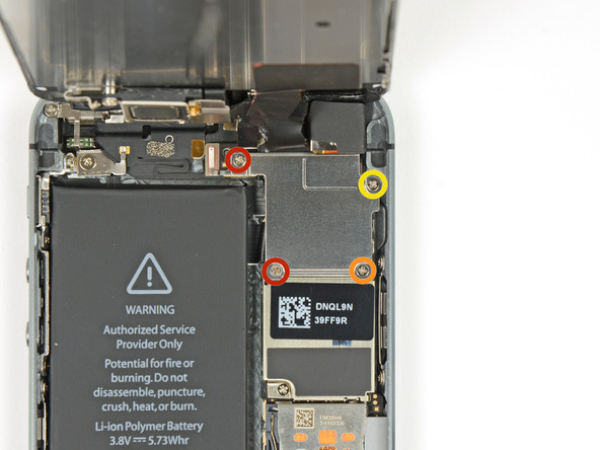
There are four Phillips screws securing the front panel assembly cable bracket to the logic board. You need to remove them.
Two 1.7 mm screws
One 1.2 mm screw
One 1.3 mm Phillips screw
The last one might not get attracted to a magnetized screwdriver, so be careful not to lose it while you're removing the screws.


Step 14
Lastly, disconnect the LCD cable connector.
While you are reassembling your phone, the LCD may pop off the connector. If this happens, your phone could have white lines or a blank screen when you turn it back on. To solve this problem, reconnect the cable and power cycle your phone. The best way to do this is to disconnect and then reconnect the battery.