iPhone 6 Battery Replacement

Send this link via e-mail
|
Tweet |
|
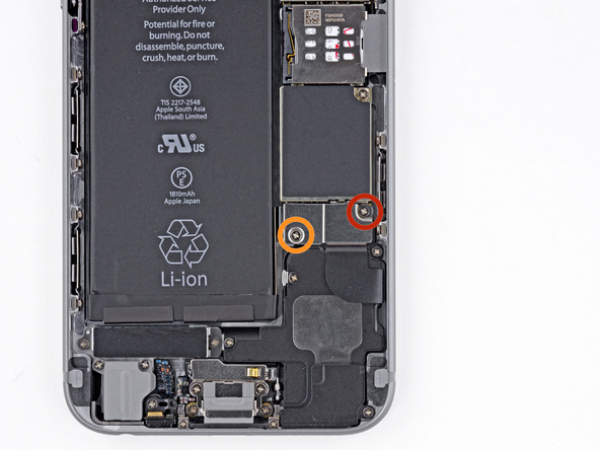
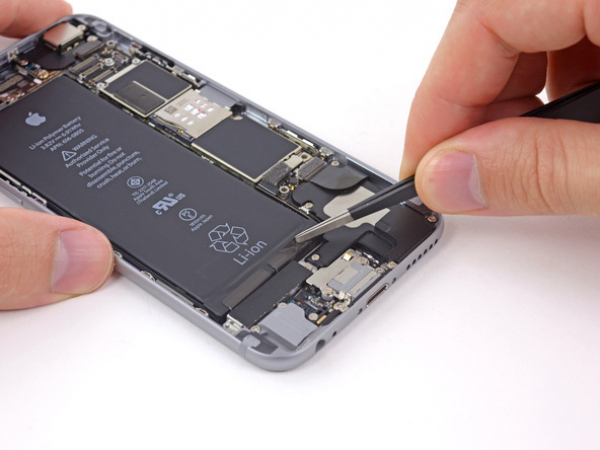
Step 1 - Battery Connector
There are two Phillips #00 screws holding the battery connector bracket. You need to remove them.
One 2.2mm screw
One 3.2mm screw
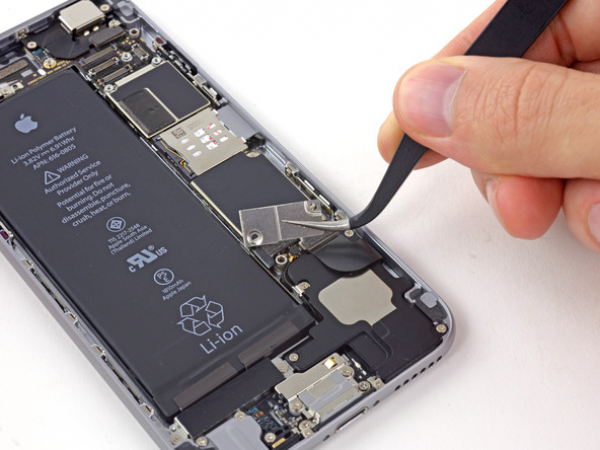
Step 3
Gently pry up on the battery connector, and lift it out of its socket on the logic board. Use a plastic opening tool to do this.
Make sure to pry up only the battery connector, and not the socket on the logic board. If you pry up on the socket, you may break the connector.
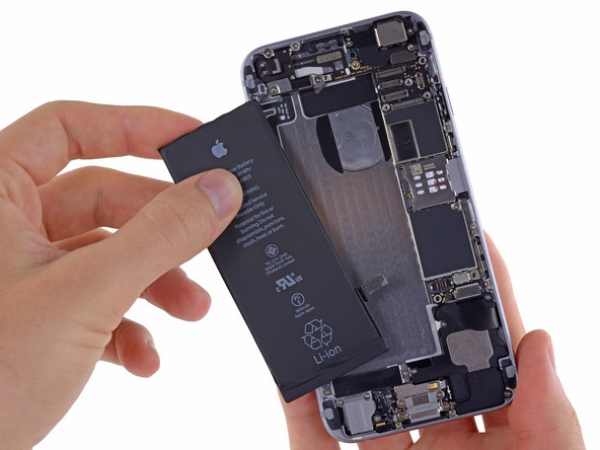
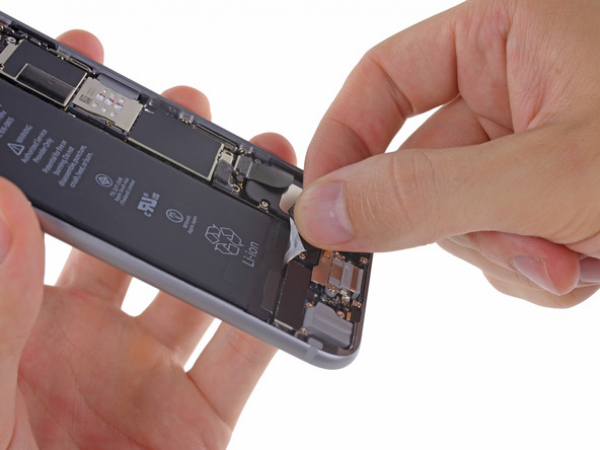
Step 4 - Battery
Back to top
Using your fingers or blunt tweezers, peel back the first battery adhesive from the bottom right edge of the battery. Be careful when you come near the battery - if you puncture a Li-Ion battery, it can release dangerous chemicals and even cause a fire.
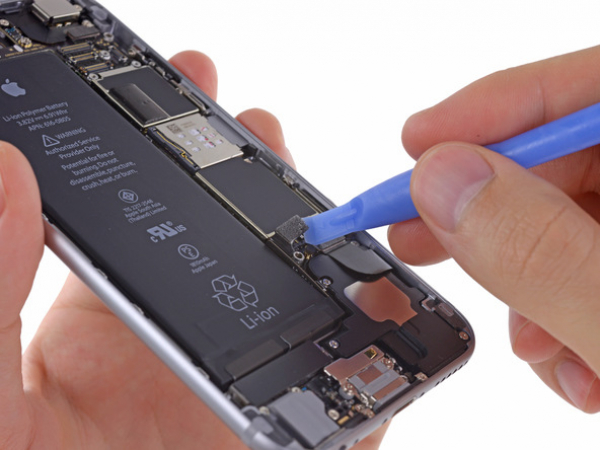
Step 5
Separate the battery adhesive tab from the battery, by pulling it toward the bottom of the iPhone.
Make sure not to pull against the battery or any of the lower components. If you do, you might rip the adhesive strip.
Keep on pulling, and allow the strip to slip out from between the battery and the rear case. When you start feeling resistance from the strip, stop pulling, and move on to the next step.
In case the battery adhesive tabs break off during the removal process, grab the remaining adhesive with blunt tweezers or your fingers, and keep on pulling.
In case the adhesive breaks off underneath the battery, try removing the remaining strip first, and then retrieve adhesive. Proceed to Step 25.
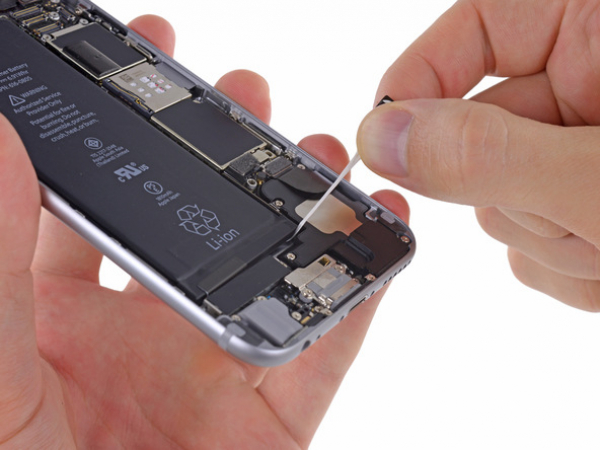


Step 6
Pull the adhesive strip around the lower right corner of the battery once you start feeling increased resistance from it.
Keep on pulling the adhesive tab up, and then away from the right edge of the battery. Let it slide slowly out from the battery and the rear case, until the strip is separated from the iPhone.
Make sure not to allow the adhesive strip to get caught on the battery connector. If this happens, it might tear or break off.
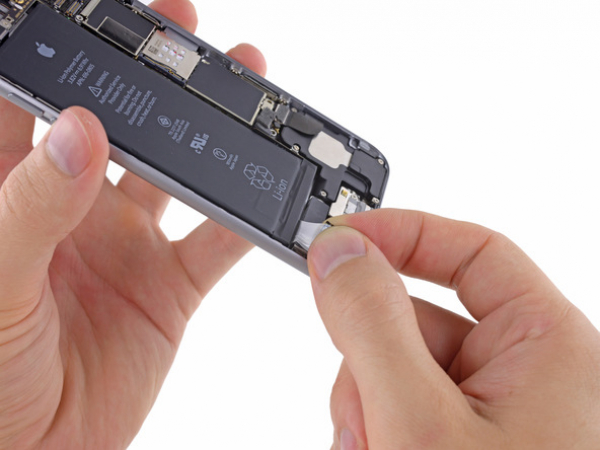
Step 7
There's another adhesive at the bottom left edge of the battery. Peel it back.
Once again, pull the adhesive tab up and away from the battery - let it slide slowly out from the battery and the rear case.
Keep on pulling the adhesive tab up. When you start feeling increased resistance from the tab, stop pulling.


Step 8
Pull the adhesive strip around the lower left corner of the battery once you start feeling increased resistance from it.
Make sure not to allow the adhesive strip to get caught on the battery connector. If this happens, it might tear or break off.
Keep on pulling the adhesive tab up, and then away from the left edge of the battery. Let it slide slowly out from the battery and the rear case, until the strip is separated from the iPhone.
If you've managed to remove both strip with success, you can move on to the Step 27.
If one or both adhesive strips broke off underneath the battery, and you did not manage to retrieve it, move on to Step 25.
Step 9
If the battery's still stuck to the rear case, this means that one or both adhesive strips broke off. To remove them completely, you'll need an iOpener or a hair dryer to heat the part of the rear case behind the battery.
Step 10
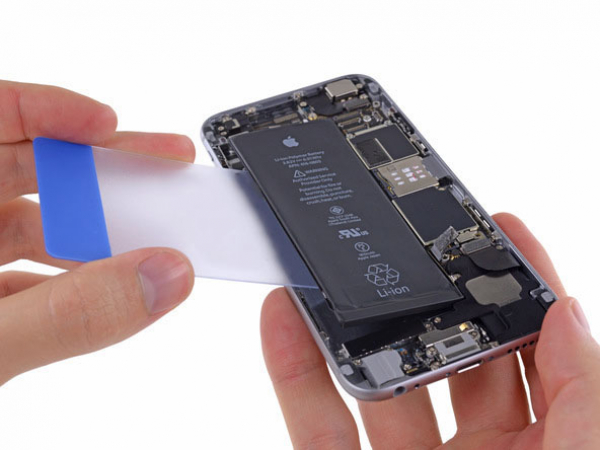
Turn the iPhone over, and push a plastic card between the rear case and the case side of the battery.
Make sure not to pry against the logic board. If you do, you might damage the phone.
In order to avoid bending the battery, keep the card as flat as possible. If you damage the battery, you will be exposed to dangerous chemicals from it.
Push the card even farther to break the adhesive behind the battery.