iPhone 8 Screen Replacement

Send this link via e-mail
|
Tweet |
|


Step 1 - Before You Start
- Before you start disassembling the phone, discharge the battery to below 25%. - Turn off your phone. - Remove the SIM tray.
Caution:
- If the battery is swollen: - Take adequate measures and precautions. - Do not heat your phone. - Wear eye and hand protection.
Tip:
- If the display glass is broken, tape over the glass to keep further breakage. - Stick overlapping strips of transparent self-adhesive tape over the display.


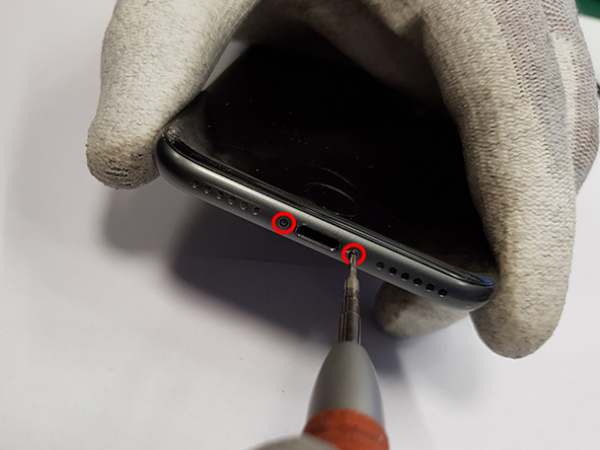
Step 2 - Opening Procedure
Back to top
- Remove the SIM tray. - Remove the two pentalobe screws at the bottom edge of the phone. - Slide an opening pick between the display and the frame. - Progress slowly along the edges. - Open the iPhone by swinging the display up from the left side. - Do not completely separate the display from the back case, several ribbon cables which connect it to the logic board are fragile and may be damaged. - Opening the phone's display will endanger its waterproof features. - Make sure you have prepared replacement seals before you start with the repair. Tip: - If your display glass is cracked, keep further breakage contained and prevent bodily harm during your repair by taping over the glass. - Use a heat gun (hair dryer) around the edges of the iPhone for about a minute in order to soften up the adhesive underneath.
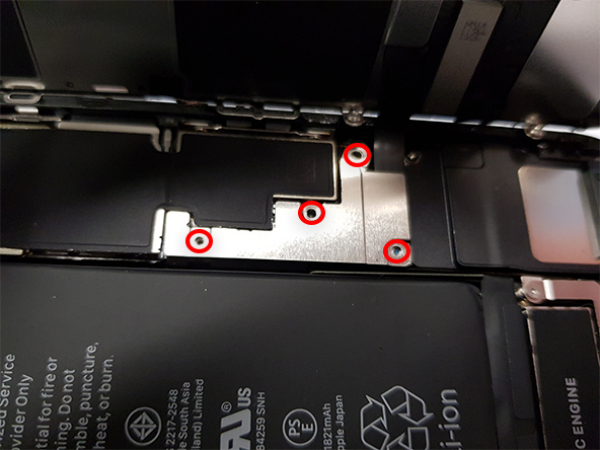


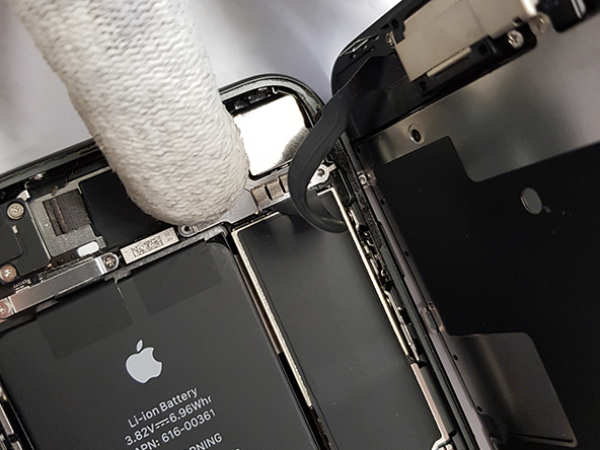
Step 3 - Disconnect LCD Display And Battery
Back to top
- Remove four Phillips screws which secure the LCD cable bracket: - Carefully use a spudger or a tweezer to disconnect LED panel connector, pry the digitizer cable connector up from its socket. -Do same thing with the sensor connector bracket, and sensor cable - Lift the cable until he separates. -Remove LCD display. Tip: - During this repair, take care of each screw's position. To avoid damages on your iPhone, make sure all the screws go back exactly where they came from.
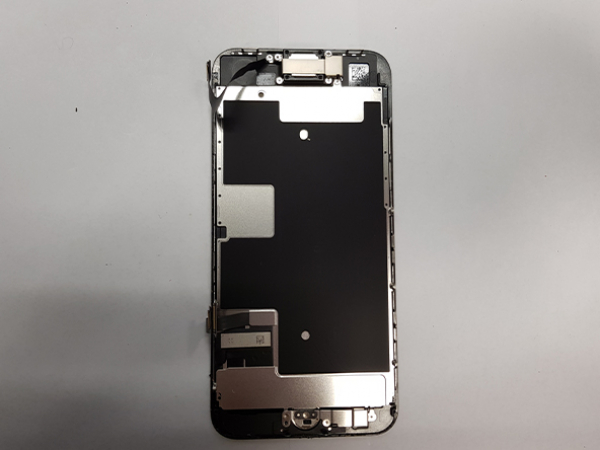


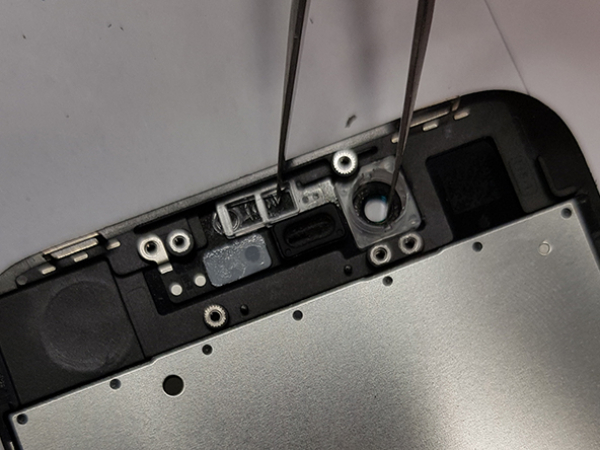
Step 4 - Disconnect Earpiece Speaker, Front Sensor Assembly And Home Button
Back to top
-Remove the screws securing the speaker and sensor. -Gently lift up the metal protection shield and take it off. -Remove earpiece. -Now unscrew four screws witch holds the home button. -Remove metal protection. -Remove three screws from left and three screws from right side of the shield. -Unglue top sensors, home button and the metal shield. -Unglue plastic holders of camera and sensors and place them on new spare. Tip: -Heat up display to make the glue loose.


Step 5 - Install The Ear Speaker And Home Button Onto The New Screen
Back to top
-Place the metal shield and screw it back from the left and right side. -Place the homebutton and reconnect it. -Now place metal shield from homebutton and screw it back. -Place the sensors in its place and earpiece. -Cover it by shield and screw it back.


Step 6 - Connect New Screen To Motherboard
Back to top
-Reconnect display and sensor flexes. -Place sensors connector cover and scew it back. -Reconnect the battery. -Place the battery and display connector cover and screw it back. -Connect the front and the back of the phone. -Press around the edges, all the clips should click-in-place.