


iPhone 8 Plus Battery Replacement

Send this link via e-mail
|
Tweet |
|


Step 1 - Before You Start
- Before you start disassembling the phone, discharge the battery to below 25%. - Turn off your phone. - Remove the SIM tray.
Caution:
- If the battery is swollen: - Take adequate measures and precautions, - Do not heat your phone. - Wear eye and hand protection.
Tip:
- If the display glass is broken, keep further breakage contained by taping over the glass. - Lay overlapping strips of clear self-adhesive tape over the display.
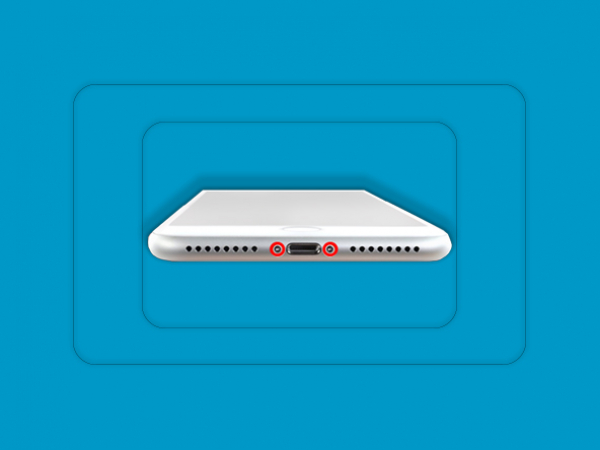


Step 2 - Opening Process
Back to top
- Remove the SIM tray. - Remove the two pentalobe screws. at the bottom edge of the phone. - Apply a heat gun or hairdryer to the lower edge of the iPhone. - Slide an opening pick between the display and the frame. - Progress slowly along the edges. - Open the iPhone by swinging the display up from the left side. - Don't try to fully detach the display, several cables are still connected to the iPhone's logic board. - Opening the phone's display will endanger its waterproof features. - Make sure you have prepared replacement seals before you start with the repair.
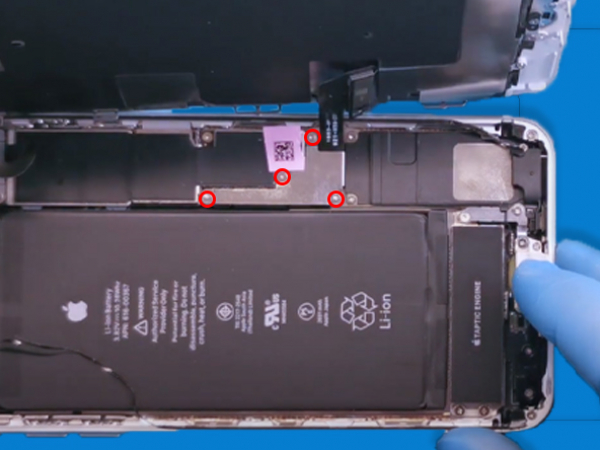


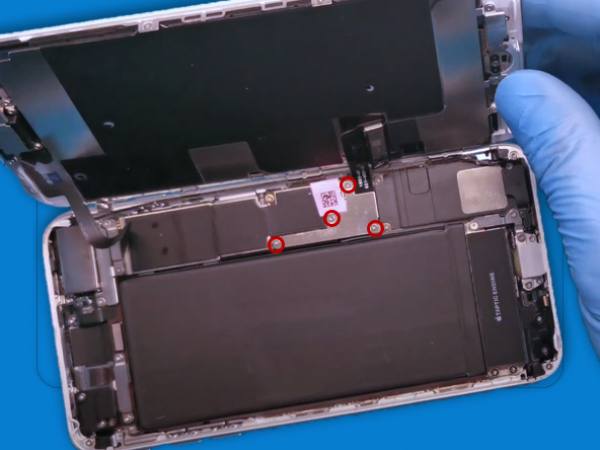
Step 3 - Disconnect The Battery
Back to top
- Remove four Phillips screws which secure the lower LCD cable bracket: - Remove the screws securing the display connector bracket and remove the bracket. - Carefully use a spudger to disconnect the battery connector, and pry the digitiser cable connector up from its socket. - Lift the cable until he separates. Tip: - Keep a record of each screw so you can put them back where they belong to avoid damaging your iPhone.
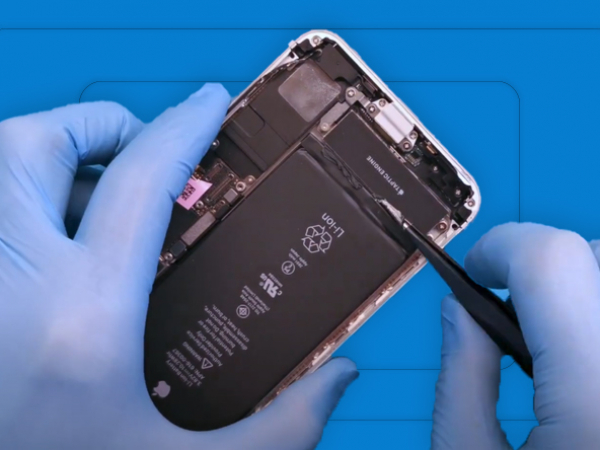


Step 4 - Removing The Battery
Back to top
The iPhone 8 Plus's battery is secured by four pieces of stretch-release adhesive. -Use tweezers to peel back the battery adhesive tab. - Just start slowly pulling them one by one. - Don't rush it, because they might break, which jeopardizes the battery removal. - When the tabs are completely removed there shouldn't be any more glue under the battery. - Slide the top of the spudger and lift up the battery. - Remove the old battery.
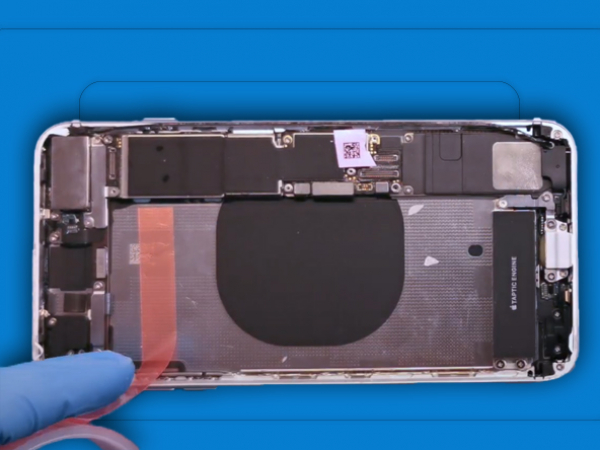


Step 5 - Installing The New Battery
Back to top
Tips: - You should always test your repairs before you reseal the device. - Connect the new battery to the motherboard. - Turn on your device. - Once you are sure that the phone is working normally, turn it off again. - Disconnect the battery. - Use a double-sided self-adhesive tape. - We need two small pieces. - Put the battery in the place. - Gently press around the battery perimeter to make it bond to the adhesive strips. - Connect the battery to the logic board one final time.


Step 6 - End Process
Back to top
- Install the metal bracket and secure it with 4 screws. - Lower the front panel and align it with the metal body. - Adjust the top clips first. - Carefully press around the edges until the entire display clicks in. - Insert the SIM card. - Repair is done. - You can now power on your phone.

Step 7 - IPhone 8 Plus Screen Replacement And Phone Repair
Back to top
If you were unable to fix your device yourself, order a screen repair or other mobile repairs at MyTrendyPhone.