


Samsung Galaxy S7 Battery Replacement

Send this link via e-mail
|
Tweet |
|


Step 1 - Before You Start
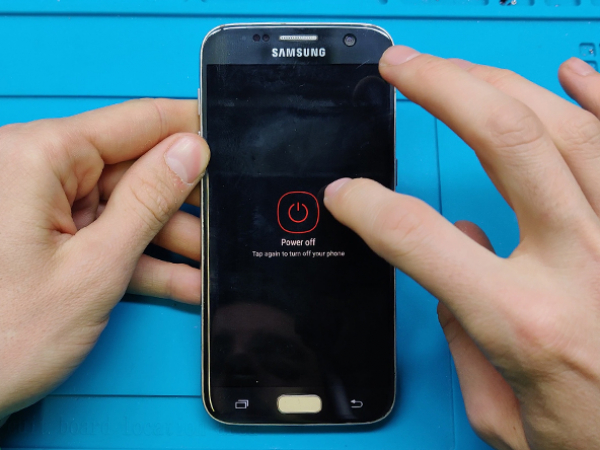
Make sure the device battery level is at around 20% charge.
Turn off the device.
Remove the memory / SIM card tray.


Step 2 - Heating The Glue
Back to top
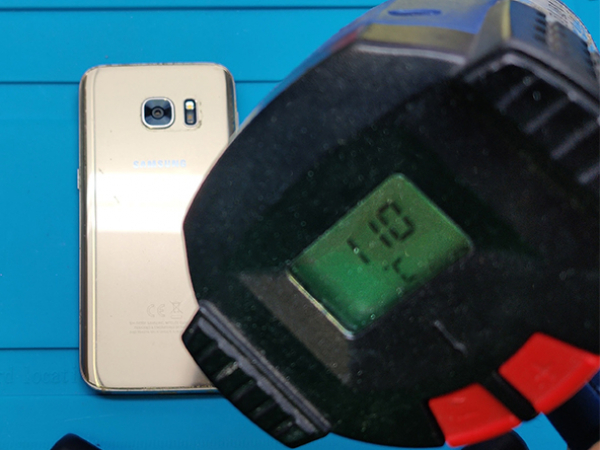
To loosen the glue we are using the heat gun at 110°C.
A hair dryer, or hot plate may also be used, but be careful not to overheat the phone - the OLED display and internal battery are both susceptible to heat damage.
Note: Opening your phone will compromise its waterproof seals. Have replacement adhesive ready before you proceed, or take care to avoid liquid exposure if you reassemble your phone without replacing the adhesive.


Step 3 - Removing The Back Glass
Back to top
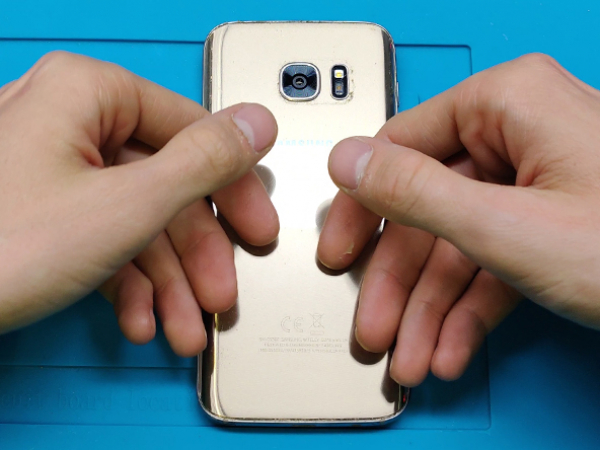
When the back panel is warm to the touch, slide the thin metal opener between the glass and frame of the phone.
Work all around the edge to cut through the glue.
You can use a suction cup to help you lift the glass off the frame easier.
The rear glass should come off relatively easy.
If you have trouble, apply more heat to further soften the adhesive, and try again. The adhesive cools very fast, so you may need to heat it repeatedly.
Optionally, you can add a few drops of isopropyl alcohol into the gap to help weaken the adhesive.
Lift the glass and remove it from the phone.
Tip: If the phone's back cover is cracked, the suction cup may not stick. Try lifting it with a strong tape, or superglue the suction cup in place and allow it to cure so you can proceed.


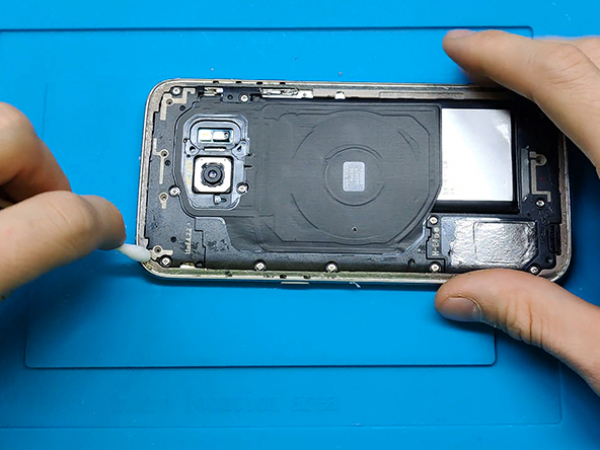
Step 4 - Lots Of Screws
Back to top
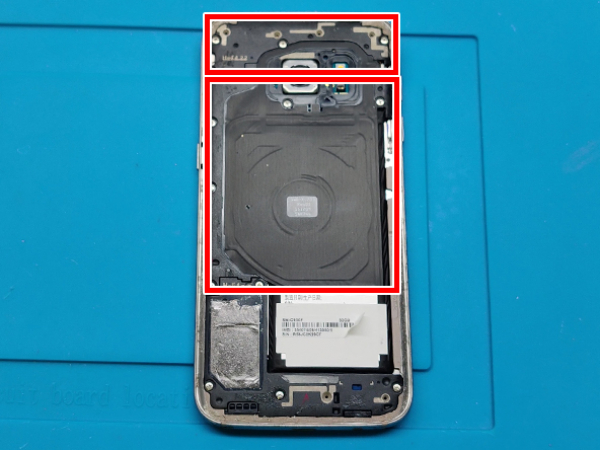
Now, remove the black plastic covers.
It consists of 3 parts.
For this repair you should remove only the upper and the middle one.
The middle one is the NFC & wireless charging assembly.
The bottom one is the loudspeaker assembly, but you do not need to remove it for this repair since it does not cover the battery.
Start removing the 3.5mm Phillips screws.
Once you've undone the 8 screws you can remove the upper and the middle plastic covers.
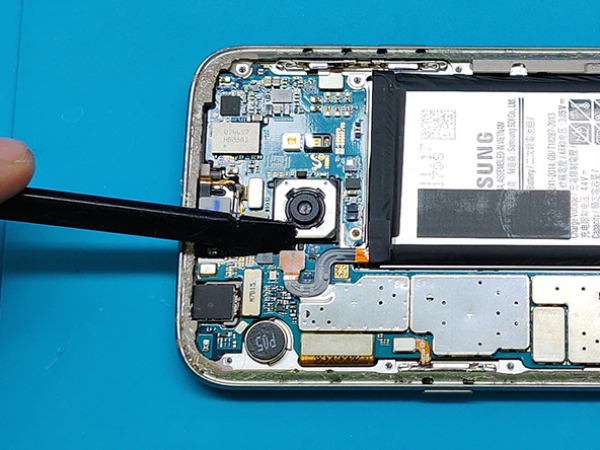


Step 5 - Removing The Old Battery
Back to top
In this step we disconnect the battery connector from the motherboard.
It sits near the camera.
Now you can remove the battery out of the case.
Use the flat end of the spudger to pry the battery out.
Be very careful not to puncture the battery.
Remove any remaining adhesive from the battery cavity.
You can clean the glued areas with isopropyl alcohol and a lint-free cloth.
Warning: Try your best not to deform the battery during this process. Soft-shell lithium-ion batteries can leak dangerous chemicals, catch fire, or even explode if damaged.
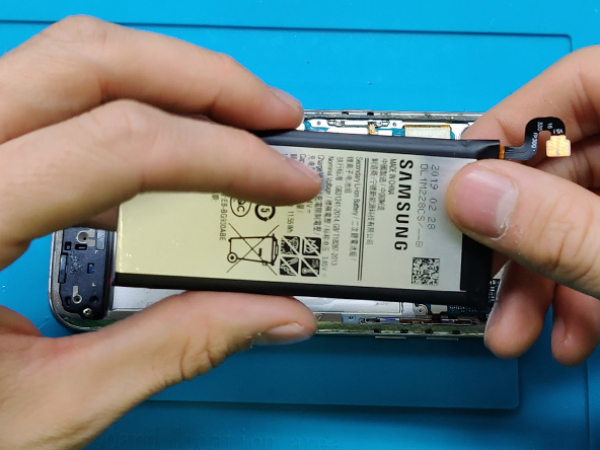


Step 6 - Testing The New Battery
Back to top
Set the new battery lightly in place.
Plug in the battery connector temporarily to ensure that the cable reaches the socket. Disconnect the battery before resuming re-assembly.
Be sure to turn on your phone and test your repair before installing new adhesive and resealing the phone.
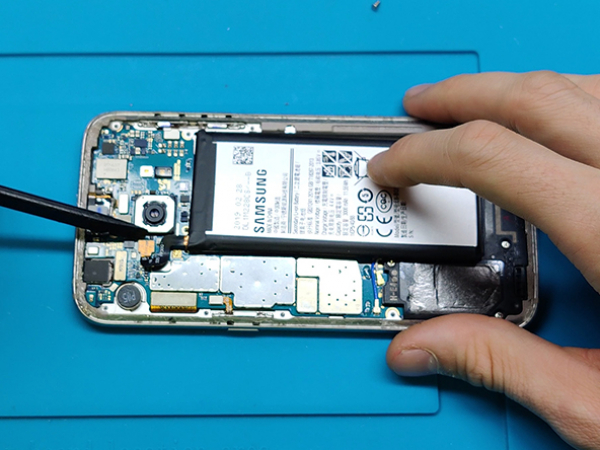


Step 7 - Installing The New Battery
Back to top
Once you've made sure that the phone works as it should with the new battery, it's time to reseal the phone and finish the repair.
Unplugg the battery connector and remove it from the case.
Cut two strips of self-adhesive double-sided tape and put them in the battery cavity as shown.
Remove the protective layer and set the battery down.
Press the battery perimeter firmly with your fingers to help the adhesive bond.


Step 8 - Lots Of Screws In Reverse
Back to top
Now you put the black plastic covers back.
Start with the larger pieace a.k.a. the NFC & wireless charging assembly.
Continue with the upper plastic cover.
Redo the 8 Phillips screws.


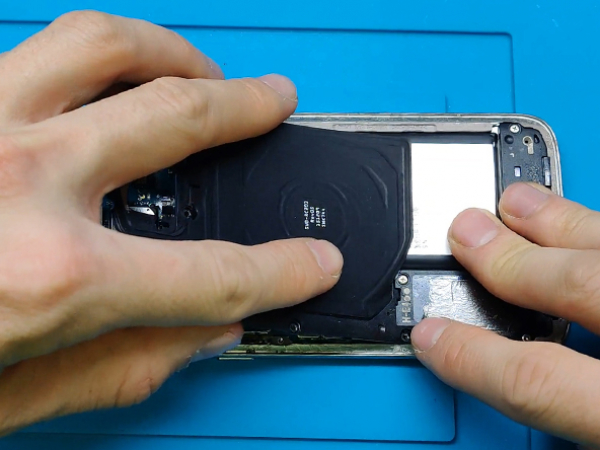
Step 9 - Putting Back The Back Cover
Back to top
Remove any remaining adhesive from the phone frame.
Put some isopropyl alcohol on the earbud to help you remove any persistant glue.
To reseal the back glass cover we will use the same double-sided self adhesive tape that we used for the battery.
It will provide enough adherence to hold the back glass tight.
Put the tape all around the edge of the phone's metal frame.
Don't forget to remove the top protective foil.
Align the back glass from the top, use the camera lens as reference.
Set the back glass cover down and press all around the edges to secure it to the frame of the phone.